Connecting Phoenix to Fitbit with OAuth2 (Part 1)
Now that we’ve learned to create a Phoenix app, add a Users model, and deploy it all to Heroku, it’s time to add authentication. In this example we’ll learn how to hook our Phoenix app up to Fitbit with OAuth2.
Specifically, we’re going to use @scrogson’s OAuth2 Library for Elixir and the Authorization Code Grant flow as described in Fitbit’s OAuth2 documentation.
To get started, follow steps 1-4 of the previous article, but add two additional fields to the user model to store the auth_token and refresh_token that we’ll get back from Fitbit.
$ mix phoenix.new my_app
Fetch and install dependencies? [Yn] Y
$ cd my_app
$ git init && git add . && git commit -m "Initial commit of generated Phoenix app"
$ curl http://[your-id].mit-license.org > LICENSE
$ git add LICENSE && git commit -m "Add MIT License"
$ mix phoenix.gen.html User users name:string email:string access_token:text refresh_token:text
$ git add . && git commit -m "Add generated User model"
# edit web/router.ex
$ git add . && git commit -m "Add users resource to browser scope"
$ mix ecto.create
$ mix ecto.migrate
$ mix phoenix.server
Whew! That’s becoming like a code kata. Eventually I should be able to do it from memory. If you need more details on any step, refer to the the previous article, and feel free to ask in the comments below or send me an email.
Note that the access_token and refresh_token are type text and not string. I learned that oauth tokens can be quite long and may not fit into the default
255 characters you get with :string.
As a sanity check, visit http://localhost:4000 and http://localhost:4000/users and make sure you can add, edit, and delete a user.
I don’t know how to write tests yet, so we’re going to do some error driven development.
Add a sign-in link
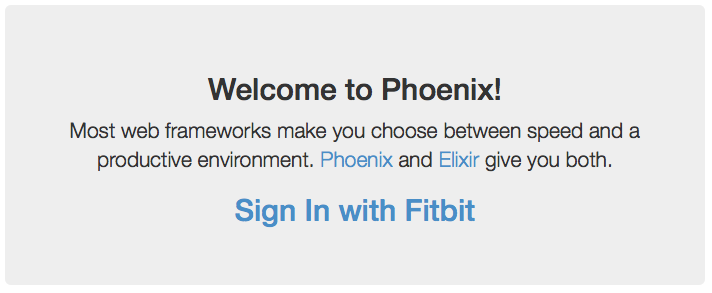
The very first thing we need is a link for the user to click, so let’s add one to the index page. Open web/templates/page/index.html.eex and add a line:
<a href="/auth"><h2>Sign In with Fitbit</h2></a>I put it just inside the first <div> so it looks like this:
Be sure to commit your changes:
$ git add . && git commit -m "Add sign-in link"We’re going to use OAuth2 to authenticate with Fitbit, so if you want to play along you’ll need to register for an account.
Go ahead and click the sign-in link. You’ll get a lovely purple error page, because we haven’t yet told Phoenix what to do when someone visits the /auth path in this app. The error (at the top) is:
Phoenix.Router.NoRouteError at GET /auth
no route found for GET /auth (MyApp.Router)
Well, that’s pretty clear. We need a route. We’ve already edited the web/router.ex file once, to add the ‘users’ resource the scope that handles the root of the app. So let’s return there and add the /auth scope.
We could add resources "/auth", AuthController below the one for /users and that would generate the canonical eight resources for show/edit/update/delete/etc. (You can see these with mix phoenix.routes.)
In this case, though, we only need to support /auth (and later, /auth/callback). Let’s try this:
  scope "/auth", MyApp do
    pipe_through :browser
    get "/", AuthController, :index
  end
This says that when a request comes in for /auth, we should go through the :browser pipeline (it’s further up the same file) and then start looking for a match. If we see a GET for the ‘root’ of /auth then go to the :index action of the AuthController.
$ git add . && git commit -m "Add auth scope to router.ex"Add the AuthController
Hit the back button in your browser and try that Sign In with Fitbit link again. Now the error is:
UndefinedFunctionError at GET /auth
undefined function: MyApp.AuthController.init/1 (module MyApp.AuthController is not available)
Which makes perfect sense! We haven’t written an AuthController yet.
I didn’t see a way to generate (only) a controller in the Phoenix Mix Tasks docs or with with mix help | grep -i phoenix, but we can copy the PageController and modify it.
$ cp web/controllers/page_controller.ex web/controllers/auth_controller.exSo we have (in web/controllers/auth_controller.ex):
defmodule MyApp.PageController do
  use MyApp.Web, :controller

  def index(conn, _params) do
    render conn, "index.html"
  end
end
We need to make a few edits. First, change PageController to AuthController.
Next, in this case we want to redirect to Fitbit, so instead of the ‘render’ line, we want:
defmodule MyApp.AuthController do
  use MyApp.Web, :controller

  def index(conn, _params) do
    redirect conn, external: "https://www.fitbit.com/oauth2/authorize"
  end
end
(Yes, I know, hard-coding the url is bad. This is the “make it work” part. We’ll “make it right” later.)
$ git add . && git commit -m "Add auth controller"Incorporate oauth2 package
And now go back and click, and you should land on Fitbit’s site with an error because we haven’t sent them all the required info.
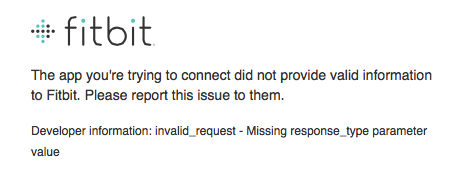
This is progress! Now it’s time to incorporate the @scrogson’s OAuth2 Library for Elixir.
Review the usage instructions on https://github.com/scrogson/oauth2.
First, let’s add the oauth2 package as a dependency and to the list of applications in mix.exs (which is in the root directory of your project).
-                    :phoenix_ecto, :postgrex]]
+                    :phoenix_ecto, :postgrex, :oauth2]]

-     {:cowboy, "~> 1.0"}]
+     {:cowboy, "~> 1.0"},
+     {:oauth2, "0.2.0"}]
then execute
$ mix deps.get
$ git add . && git commit -m "Add oauth2 dependency"
We’re going to use the “Authorization Code [Grant] Flow” described in both the OAuth2 Library docs and the Fitbit OAuth2 docs. (Not the Implicit Grant Flow. If you’re reading the Fitbit docs, there is a typo I asked them to fix.)
The section on Authorization Code Flow says we should “initialize a client”. Where does that go? Oh, further down, it talks about writing your own strategy. That must be what we need.
I would be pretty much stuck a this point, but luckily, there is an example application. Let’s examine it for clues.
Add a Strategy
In the example application, the ‘strategy’ is in https://github.com/scrogson/oauth2_example/blob/master/web/oauth/git_hub.ex, so in our app, we’ll have web/oauth/fitbit.ex
Create that directory and file. Paste in the contents of the github example and add some attribution.
Note: I made an attempt at explaining each line of this file, but it got really long and I’m not sure I understand it all yet. So we’ll just say thank you again to @scrogson for the working example, and leave that for a future article.
There are two major differences in authorizing with Fitbit vs. GitHub.
First, Fitbit requires that you set a header called Authorization with your client id and client secret (base 64 encoded).
Second, you must pass a ‘scope’ parameter with a space-delimited list of one or more scopes. These allow you to limit what information your app asks for. Here I’m only asking for settings (because I want to set alarms) and sleep (because I’m interested in what time people are actually waking up).
The changes from the original GitHub strategy are on lines 1, 3-5, 19-21, and 42.
defmodule Fitbit do
  @moduledoc """
  An OAuth2 strategy for Fitbit.
  Based on the OAuth2 strategy for GitHub by Sonny Scroggin
  in https://github.com/scrogson/oauth2_example
  """
  use OAuth2.Strategy
  alias OAuth2.Strategy.AuthCode

  # Public API

  def new do
    OAuth2.new([
      strategy: __MODULE__,
      client_id: System.get_env("CLIENT_ID"),
      client_secret: System.get_env("CLIENT_SECRET"),
      redirect_uri: System.get_env("REDIRECT_URI"),
      site: "https://api.fitbit.com",
      authorize_url: "https://www.fitbit.com/oauth2/authorize",
      token_url: "https://api.fitbit.com/oauth2/token"
    ])
  end

  def authorize_url!(params \\ []) do
    OAuth2.Client.authorize_url!(new(), params)
  end

  def get_token!(params \\ [], headers \\ []) do
    OAuth2.Client.get_token!(new(), params)
  end

  # Strategy Callbacks

  def authorize_url(client, params) do
    AuthCode.authorize_url(client, params)
  end

  def get_token(client, params, headers) do
    client
    |> put_header("Accept", "application/json")
    |> put_header("Authorization", "Basic " <> Base.encode64( System.get_env("CLIENT_ID") <> ":" <> System.get_env("CLIENT_SECRET")))
    |> AuthCode.get_token(params, headers)
  end
end
git add . && git commit -m "Add a module for the Fitbit OAuth2 strategy"Now that we have the strategy we can return to our auth controller and remove that hard-coded url. Instead, we’ll ask the Fitbit strategy for the url.
Make this change in the auth controller:
   def index(conn, _params) do
-    redirect conn, external: "https://www.fitbit.com/oauth2/authorize"
+    redirect conn, external: Fitbit.authorize_url!(scope: "settings sleep")
   end
If you have not already done so, register for an account with Fitbit and then register your application.
When registering your application,
- Choose ‘Server’ for OAuth 2.0 Application Type, and
- Enter ‘http://localhost:4000/auth/callback’ for the Callback URL.
Set environment variables for the CLIENT_ID, CLIENT_SECRET, and REDIRECT_URI.
When setting the environment variables, be sure to use the ‘OAuth 2.0 Client ID’ and the ‘Client (Consumer) Secret’ provided by Fitbit after you registered your application. In addition, be sure that REDIRECT_URI is set to the same thing you registered with Fitbit as a Callback URL. We’ll revisit the configuration in Part 2, so don’t worry too much about the redirect/callback.
Because I’m working with different projects that use the same environment variable names, I do this by creating a .fitbit.env file in my home directory:
export CLIENT_ID=123XYZ
export CLIENT_SECRET=5a08XXXXXXXXXXXXXXXXXXXXXXXX8606
export REDIRECT_URI=http://localhost:4000/auth/callback
and then loading it with:
$ source ~/.fitbit.envYou will have needed to stop the application in order to configure the environment variables, so re-start it with mix phoenix.server.
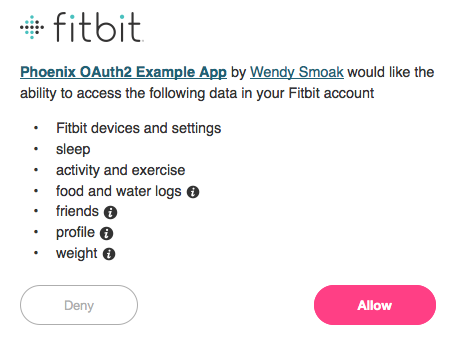
Now when you visit http://localhost:4000 and click the sign-in link, you should be prompted to authorize access to your Fitbit data. Even more progress!
We’ll stop there for now. In Part 2, we’ll learn how to
- handle the callback,
- exchange the code we’re given for an access token that we can use to make API calls,
- and to store the access token in our user model.
The code for this example is available at https://github.com/wsmoak/my_app_7191136/tree/20150720 and is MIT licensed.
Copyright 2015 Wendy Smoak - This post first appeared on http://wsmoak.github.io and is CC BY-NC licensed.