Connecting Phoenix to Fitbit with OAuth2 (Part 2)
In Connecting Phoenix to Fitbit with OAuth2 (Part 1), we stopped with the user about to click “Allow” to give us access to their Fitbit data. In this part, we’ll learn how to handle the redirect from Fitbit, store the OAuth token in the database, and use the token to ask the Fitbit API for the user’s data.
If you were following along and have the app created based on the instructions in Part 1, some things have changed. See Appendix A for details.
Register with Fitbit
First let’s revisit registering your application with Fitbit. The URL is https://dev.fitbit.com/apps/new and it should look similar to this:
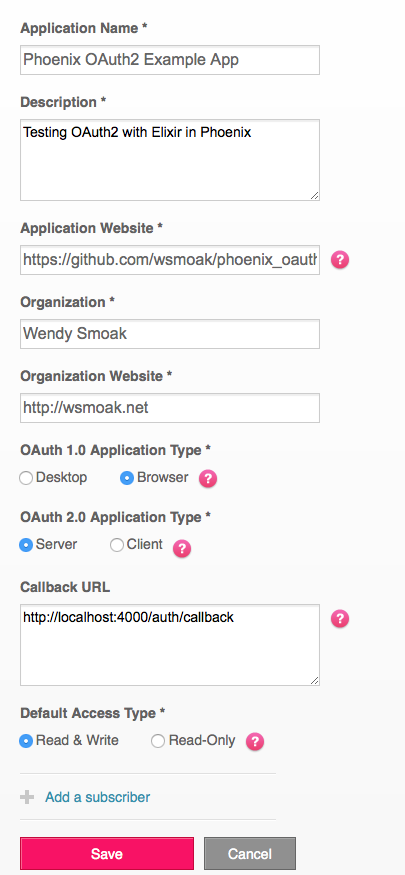
Note that you must choose an “OAuth 1.0 Application Type” even though we are using OAuth2, and that neither the Application Name nor the Organization can contain the word “Fitbit”.
The Application Website and Organization Website can be anything – they are used to create links when asking the user to grant access to their data.
Make sure that you have entered http://localhost:4000/auth/callback for the “Callback URL”, or the next part won’t work. The “OAuth2 Application Type” should be Server as well.
Handle the Redirect
Continuing on with our error driven development, start your application locally with mix phoenix.server, visit http://localhost:4000 and click the “Sign In with Fitbit” link.
You should be prompted to grant access to your data (or, alternately, to log in, and then to grant access.)
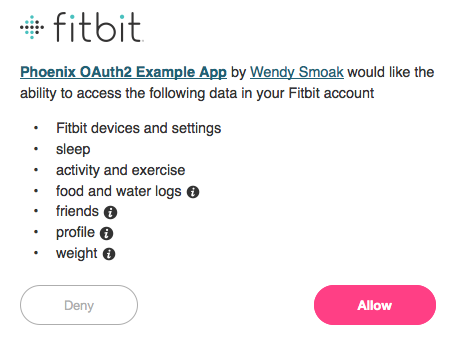
Click ‘Allow’ and… another error:
UndefinedFunctionError at GET /auth/callback
undefined function: MyApp.AuthController.callback/2
I mentioned earlier (in Part 1) that we would need to handle /auth/callback, and here it is. On the error page, notice that we’re being passed a query string with a code…
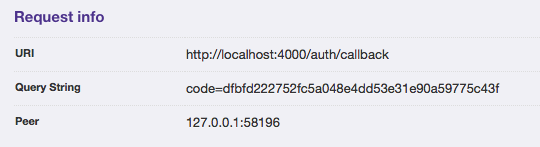
… and that it gets parsed into the map of params:
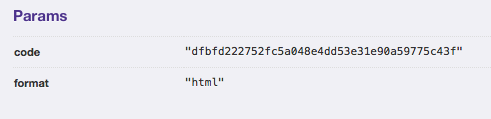
The Authorization Code Grant Flow is described in the Fitbit docs. We’ll need to exchange this code for an OAuth Access Token that we can store and use in the future to retrieve data about this user.
Back in web/controllers/auth_controller.ex where we currently have the index function that handles sending the user off to Fitbit, we’ll also add a callback function to handle it when they return to us.
(This also comes from @scrogson’s example using GitHub – see https://github.com/scrogson/oauth2_example/blob/master/web/controllers/auth_controller.ex)
def callback(conn, %{"code" => code}) do
    token = Fitbit.get_token!(code: code)
    IO.inspect token
    redirect conn, to: "/"
end
$ git add . && git commit -m "Add callback function to auth controller"Notice that instead of ignoring the second argument with _params the way we did in the index method, this time we’re pattern matching to make sure that the params map contains an element with the key of code, and capturing its value.
In the Fitbit module (web/oauth/fitbit.ex) we already have a get_token! function which delegates to the OAuth2 client, (which knows what to do.)
Here we’re just going to dump the contents of the token to the console of the running app so we can see what we’ve got to work with.
We’ll also need a route. In web/router.ex
index bb92817..280f63b 100644
--- a/web/router.ex
+++ b/web/router.ex
@@ -23,6 +23,7 @@ defmodule MyApp_808732.Router do
   scope "/auth", MyApp_808732 do
     pipe_through :browser
     get "/", AuthController, :index
+    get "/callback", AuthController, :callback
   end
$ git add . && git commit -m "Add a route for /auth/callback"This means that when a request comes in for /auth/callback, the callback function in AuthController will be executed. (IF the params map contains ‘code’ that is – we haven’t provided a fallback or any error handling yet.)
Try the Redirect
Let’s see what happens. Go back through the flow and click ‘Allow’ again.
This time you should end up back on the index page with the Sign In link, but if you watch the browser closely you may see that the URL changes first to /auth/callback?code=[lots_of_chars] and then to localhost:4000. And if not, you can see it in the console log, including the results of that IO.inspect token line:
%OAuth2.AccessToken{access_token: "eyJhbG[...]a09Vv1PYmRE0",
 client: %OAuth2.Client{authorize_url: "https://www.fitbit.com/oauth2/authorize",
  client_id: "123AB4", client_secret: "5a0[...]606",
  headers: [{"Content-Type", "application/x-www-form-urlencoded"},
   {"Accept", "application/json"},
   {"Authorization",
    "Basic MjI5[...]jA2"}],
  params: %{"client_id" => "123AB4",
    "client_secret" => "5a08[...]606",
    "code" => "1037[...]148d",
    "grant_type" => "authorization_code",
    "redirect_uri" => "http://localhost:4000/auth/callback"},
  redirect_uri: "http://localhost:4000/auth/callback",
  site: "https://api.fitbit.com", strategy: Fitbit, token_method: :post,
  token_url: "https://api.fitbit.com/oauth2/token"}, expires_at: 1437941314,
 other_params: %{"scope" => "activity social profile sleep weight nutrition settings",
   "user_id" => "456CD7"},
 refresh_token: "5e443[...]cdca6",
 token_type: "Bearer"}
Here, we’ve successfully exchanged the code (that Fitbit sent the user back with) for an OAuth access token and refresh token. We’ll need to store the access token so that the next time the user returns, we won’t have to ask for authorization again. We’ll also store the refresh token for later use.
Store the Token
We can do that by creating an Ecto ‘changeset’ as described in the Ecto Models doc, and then inserting the changeset in the Repo. In web/controllers/auth_controller.ex we now have:
def callback(conn, %{"code" => code}) do
token = Fitbit.get_token!(code: code)
IO.inspect token
changeset = User.changeset(%User{},
%{user_id: token.other_params["user_id"],
access_token: token.access_token,
refresh_token: token.refresh_token
})
Repo.insert!(changeset)
conn
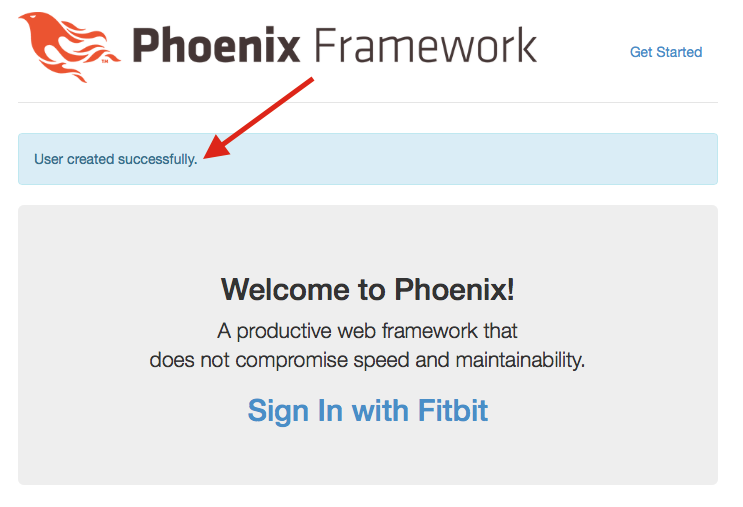
|> put_flash(:info, "User created successfully.")
|> redirect(to: "/")
end$ git add . && git commit -m "Add user to database"(If you’re interested, the Repo is defined in lib/my_app_808732/repo.ex.)
Before this will work, we’re going to have to make a change to our model. When we generate a model with Phoenix, by default it makes all of the fields required. For now, let’s make them all optional. In web/models/user.ex:
-  @required_fields ~w(name email user_id access_token refresh_token expires_at)
-  @optional_fields ~w()
+  @required_fields ~w()
+  @optional_fields ~w(name email user_id access_token refresh_token expires_at)
$ git add . && git commit -m "Make all User model fields optional"Note that if you were following along with Part 1, the model has changed, and we are using a newer version of Phoenix. See Appendix A for details on checking out the “before” version if you want to follow along with Part 2.
Authorize and Add User
This is the moment of truth! Visit http://localhost:4000 and go through the flow again. When you click ‘Allow’, you should land back on the index page with a flash message…
… and if you visit http://localhost:4000/users, you should see that a user has been added with a user_id, access_token and refresh_token:
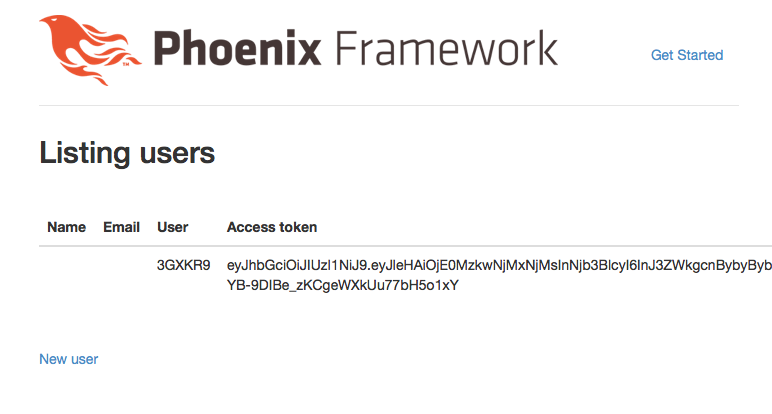
(This is part of what Phoenix generated for us with mix phoenix.gen.html ... – obviously, we’ll need to remove or secure these pages at some point!)
Make an API Call
Now that we’ve successfully authenticated a user and stored the access token, we can use it to make a call to the Fitbit API and retrieve the user’s data.
To find out how to do that, I looked (again!) at @scrogson’s example. On line 25 of https://github.com/scrogson/oauth2_example/blob/master/web/controllers/auth_controller.ex#L25 we can see the call to the GitHub API.
    # Request the user's data with the access token
    user = OAuth2.AccessToken.get!(token, "/user")
In addition, the docs for the OAuth2 package are available on hexdocs: http://hexdocs.pm/oauth2/
Consulting the Fitbit API docs for Get User Info we see that since we have an OAuth token, it will be GET /1/user/-/profile.json.
Let’s change our callback function again:
def callback(conn, %{"code" => code}) do
token = Fitbit.get_token!(code: code)
data = OAuth2.AccessToken.get!(token, "/1/user/-/profile.json")
IO.inspect data
user_name = data["user"]["displayName"]
changeset = User.changeset(%User{},
%{user_id: token.other_params["user_id"],
access_token: token.access_token,
refresh_token: token.refresh_token,
name: user_name
})
Repo.insert!(changeset)
conn
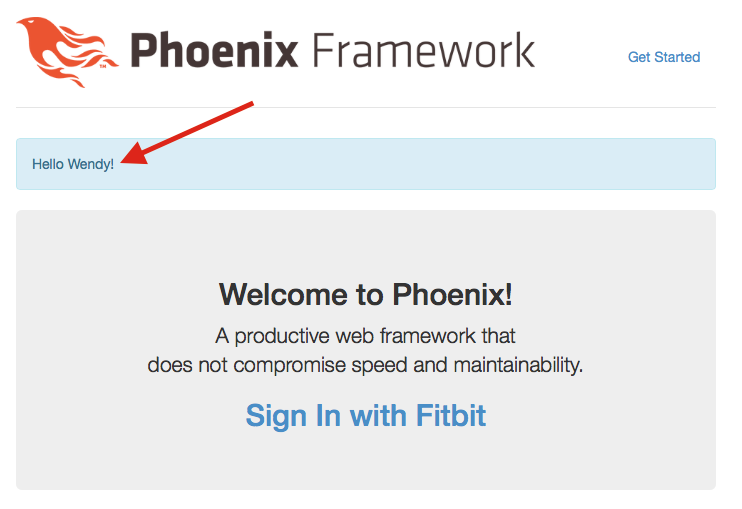
|> put_flash(:info, "Hello #{user_name}!")
|> redirect(to: "/")
end$ git add . && git commit -m "Store the user's name and say Hello in a flash message"This was done in two steps. First I made the API call and IO.inspected what came back to figure out how to get at the display name. Once I had that, I bound it to the user_name variable so I could insert it in the database and also use it in the flash message.
The #{...} syntax is string interpolation and allows us to insert values into a string without adding the bits together with the <> concatenation operator.
And now, If you visit http://localhost:4000 and go through the authorization flow, you should see your name when you return!
Conclusion
That wraps up Part 2 of Connecting Phoenix to Fitbit with OAuth2. We’ve seen how to ask a user to grant us access to their Fitbit data, stored the access token, and used it to make an API call to retrieve their profile information. In the next part, we’ll see what happens when a user returns to the site, how to retrieve the access token that we stored, and how to use it to make additional API calls.
Note: This works (or it did in early August 2015) with Elixir 1.0.4 and Phoenix 0.16.1. If you’re reading this in the future and it doesn’t work, let me know so I can update the post or point readers to a better article.
The code for this example is available at https://github.com/wsmoak/my_app_808732/tree/20150810 and is MIT licensed.
Copyright 2015 Wendy Smoak - This post first appeared on http://wsmoak.github.io and is CC BY-NC licensed.
References
- Connecting Phoenix to Fitbit with OAuth2 (Part 1)
- Fitbit Authorization Code Grant Flow
- Ecto Models
- Fitbit API Get User Info
- @scrogson on Twitter
- OAuth2 Library for Elixir
- OAuth2 Example with GitHub
Appendix A
Changes:
- Instead of Phoenix 0.14, we’re using the latest 0.16.1
- The access_token and refresh_token are binary intead of string
To follow along, clone the repository and branch from the ‘before’ tag.
https://github.com/wsmoak/my_app_808732/tree/before
$ git clone https://github.com/wsmoak/my_app_808732.git
$ cd my_app_808732
$ git checkout -b my-branch before
$ mix deps.get
$ npm install
$ mix ecto.create
$ mix ecto.migrate
You can now start the endpoint with mix phoenix.server.
Appendix B
To revoke access to your Fitbit data, log in and visit https://www.fitbit.com/user/profile/apps. Click the “Revoke Access” button.