Re-Ordering Components on Chargify Hosted Signup Pages
Chargify offers hosted Public Signup Pages so that you don’t have to worry about handling credit card data when your customers sign up for your product or service. If you use Components as part of your pricing model, you may have noticed that they always appear in alphabetical order, and that there is no option to re-order them. If you need to display them in a different order, it’s not hard to do with a little Custom JavaScript (JQuery).
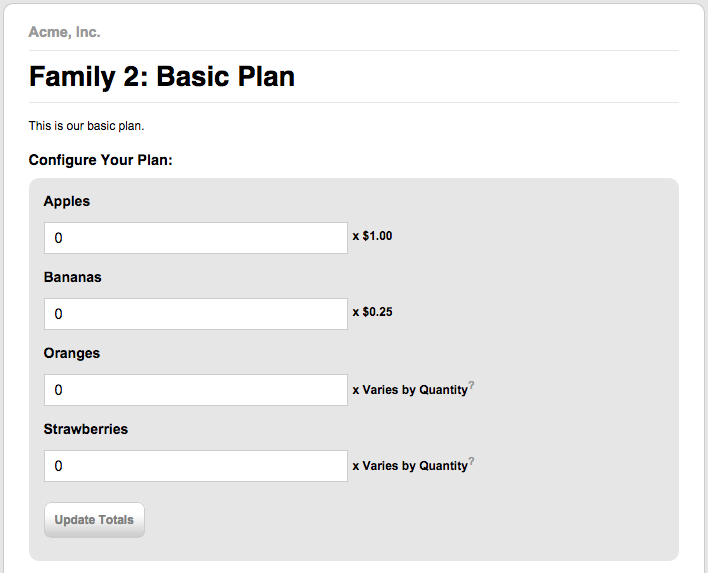
Here is part of a signup page listing some types of fruit that you can add to your monthly order:
Examining the source of the page, we find that the components are wrapped in <div> elements:
  <h2>Configure Your Plan:</h2>
  <div class="component_configuration" id="component_configuration">
    <div class="row" id="component_row_109264">
      <p class="left">
      <input id="components__component_id" name="components[][component_id]" type="hidden" value="109264" />
      <label class="component-label" for="component_allocated_quantity_109264">Apples</label><br>
      [...]
    </div>
    <div class="row" id="component_row_109266">
      <p class="left">
      <input id="components__component_id" name="components[][component_id]" type="hidden" value="109266" />
      <label class="component-label" for="component_allocated_quantity_109266">Bananas</label><br>
      [...]
    </div>
  [...]
</div>UPDATE: The div for each component now has a unique id!
Because of this, you can easily select them:
var comp1 = $( "#component_row_109264" );
var comp2 = $( "#component_row_109266" );
var comp3 = $( "#component_row_109265" );
var comp4 = $( "#component_row_109267" );
And having done that, you can re-order them however you like:
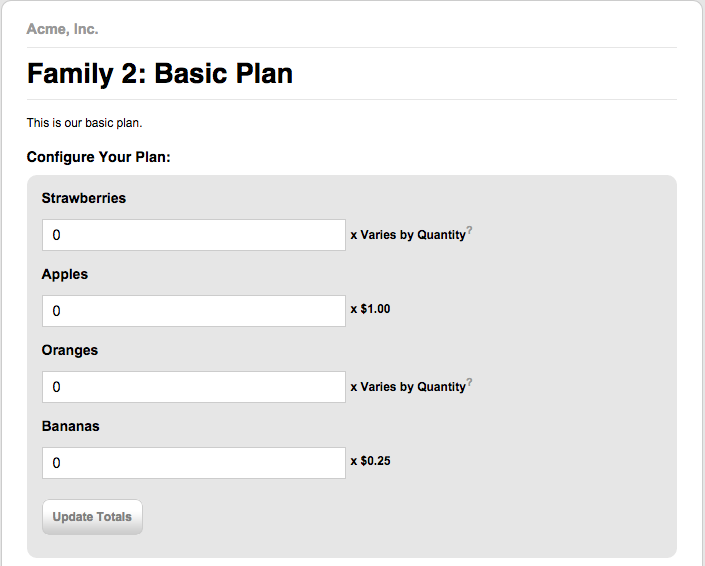
comp3.insertBefore(comp2);
comp4.insertBefore(comp1);
This will reverse the order of the second and third components, and then move the fourth one to the top. Now the components are listed in a different order:
It can also be done without the intermediate var assignment:
$( "#component_row_109265" ).insertBefore( $("#component_row_109266") );
$( "#component_row_109267" ).insertBefore( $("#component_row_109264") );
As you might expect, in addition to insertBefore there is also insertAfter, and you can search the JQuery docs to find out what else is available.
Feel free to fork and experiment with this JSFiddle: http://jsfiddle.net/wsmoak/1maef2ow/6/
Setup
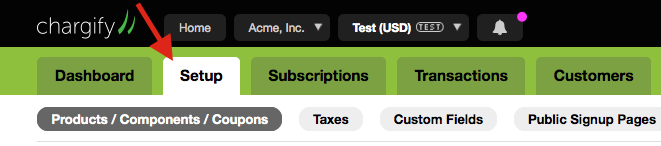
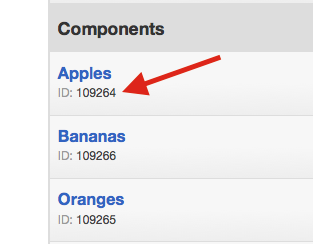
Note that you will need to replace the numbers with the ids of your own components, which can be found on the Setup tab in your Chargify account.
Once you have the code working the way you want it to, return to Chargify and edit your Public Signup Page. Paste the code into the “Custom JavaScript” area (you may need to un-check the ‘Use default’ checkbox first) and then save your changes.
Be sure to thoroughly test your signup pages before launching them!